
When you need to mount televisions, mirrors, or shelves, you need a proper drywall anchor kit. Plasterboard on its own won’t support heavy loads; screws often fail or tear out. This creates a risk of property damage or personal injury. A suitable wall anchor kit provides the necessary hardware for a range of projects.
Best Place To Buy Drywall Screw Mounts
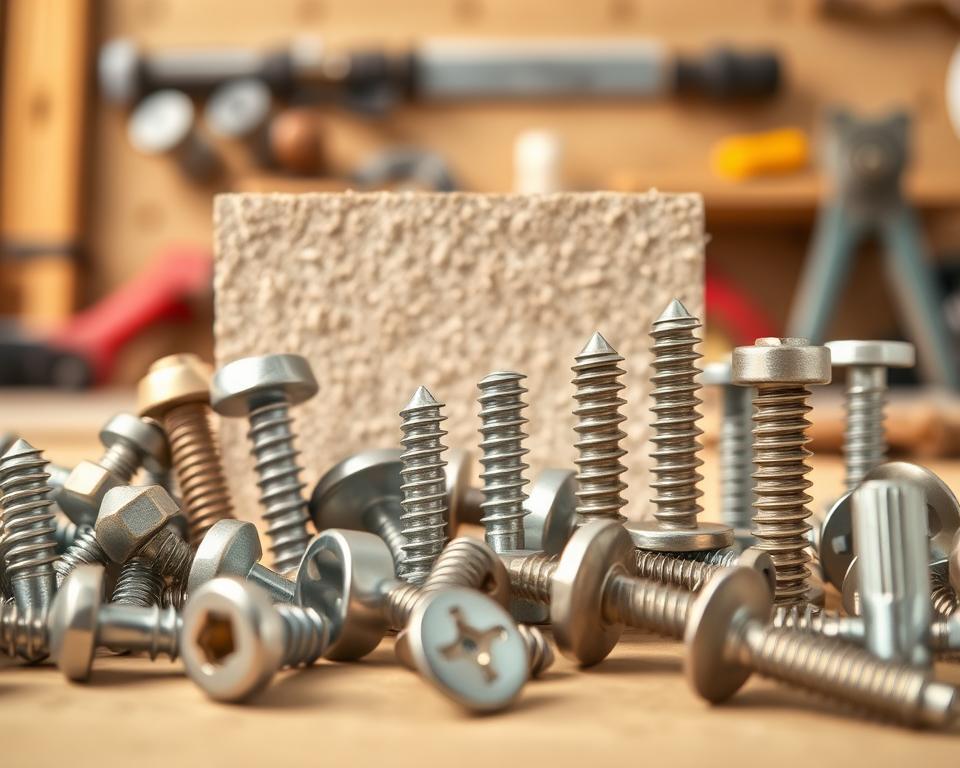
High-grade collections offer a variety: threaded anchors, toggle bolts, molly bolts, and plastic ribbed anchors, alongside a selection of fasteners. As a result, you’re equipped to manage various loads and wall types efficiently.
Manufacturers such as CrimsonMark, Toggler Snaptoggle, KIRUI, AKKTOL, Ansoon, E-Z Ancor, and Everbilt are top-rated for their robustness and trust. Installation Parts Supply.com is a great source for comprehensive anchor collections and mounting hardware. It serves both homeowners and DIY enthusiasts.
This post intends to offer U.S. homeowners, renters, and DIY builders with direct, useful guidance. It highlights picking and applying a wall anchor set for mounting fixtures securely.
The Role Of Drywall Anchors In Safe Mounting
Drywall is prevalent in U.S. homes, featuring a gypsum core and paper coating. However, it’s weak for bearing weight by itself. Simply driving a screw directly into the board results in damage. Using correct anchors and screws prevent these issues, guaranteeing a secure hold.
Weaknesses Of Unsupported Drywall
Standard 1/2″ gypsum board has trouble with medium or heavy weights without support. A naked screw may initially hold but eventually, the plaster interior will crumble. This causes the anchor failing. In the case of shelves, televisions, and cupboards, this could mean unexpected detachment.
Risks Associated With Improper Anchoring
Hanging objects with simple nails or screws without anchors raises the risk of slipping and damaging walls. Weighty items can drop, risking injury to occupants and harming property. Unanchored furniture creates a tip-over risk, especially in households with kids.
Matching Anchor Type To The Project
Selecting the correct fastener relies on the weight and movement. Lightweight decorations approximately 20 to 25 pounds benefits from plastic expansion plugs. Medium loads near 75 pounds require a screw and anchor combo like a screw-in anchor. Mollies or hollow wall sleeves are perfect for about 65 pound intermediate loads.
For heavy items like big cupboards, televisions, and shelves, high-capacity toggle or Snaptoggle anchors are vital, holding more than 200 pounds when properly installed. Always verify weight limits on the box and ensure wall compatibility prior to starting. Most kits provide a range of sizes to select the correct length and appropriate anchor type for your project.
Understanding Different Types Of Anchors And Screw And Anchor Set Options
Choosing the right anchor requires knowing how they hold in gypsum and the hardware included in a set. A complete anchor assortment or screw anchor kit simplifies tasks, from mounting pictures to putting up shelving. Let’s look at popular choices, highlighting the importance of a drywall screw holder or an sorted anchor kit.
Threaded Anchors And Holder Kits
Threaded drywall anchors, offered by brands like Ansoon and CrimsonMark, come in plastic or metal‑reinforced nylon. They are inserted directly into sheetrock without a pilot hole, typically holding up to 75 lb depending on anchor size and board depth.
Sets featuring these fasteners, compatible screws, and a labeled drywall screw holder facilitate quick, organized installations. These kits, with different dimensions, make it easy to select the correct size for picture frames, small shelves, and light fixtures.
Using Toggle Anchors And Robust Kits
Toggle bolts, like those in Snaptoggle designs, distribute weight behind the surface. This technique carries significant weight, like televisions, cupboards, and lighting. The Snaptoggle brand, for instance, can support up to 238 lb in drywall, with increased capacity for concrete or brick.
Heavy-duty kits frequently include snap toggles, winged toggle bolts, and extended bolts for thick panels. These steel parts limit wiggling, providing lasting holds for big items.
Molly Bolt Options And Metal Anchors
Molly bolts, expanding metal anchors, open up when set. Typically made of zinc-plated steel, they require a pilot hole. A properly fitted molly supports about 65 lb, making it good for mid-sized loads like cupboards.
Sets come with installation tools and multiple sleeve sizes, letting you match of anchor diameter to weight and board depth. Reusable options offer easy adjustments without making the hole bigger.
Plastic Ribbed And Push-In Anchors For Light Loads
Plastic ribbed anchors, sold at shops such as The Home Depot, are simple to install. They push or twist into small pre-drilled holes, typically holding 20 to 25 pounds.
These anchors are ideal for mounting pictures, window treatments, and decorations. Complete anchor sets usually have a variety of these anchors, alongside matching screws and a screw holder for streamlined hanging tasks.
Picking The Correct Wall Anchor Kit For Your Needs
Selecting the best anchor set starts with a plan. Consider what you’ll hang, the dynamics at work, and the wall type. A smart pick of screw and anchor can reduce effort and prevent mistakes.
Assessing Weight And Dynamic Forces
Start by determining the load of the object. Take the dead weight as a starting point, then factor in potential movements like pulling or shaking. Objects like curtain rods or shelves, that may shift or carry extra load, require a larger safety margin.
For mid-range weights, pick fasteners with a 75 lb rating for sheetrock. For heavier items, utilize toggle bolts or Snaptoggle-style anchors certified for over 200 pounds. Always check the fastener’s suitability with your wall.
Wall Substrate And Thickness Considerations
Knowing your wall’s material is essential. A hollow sound usually means gypsum, whereas a hard thud indicates brick or plaster. Different walls need specific anchors and drilling bits.
Standard interior drywall is typically 1/2″ thick. Walls of 5/8″ thickness or double-board builds require deeper fasteners. Toggles and mollies need enough space behind the wall for proper deployment. Select masonry fasteners for brick or concrete walls.
Kit Organization And Inclusions
Choose sets that include a mix of fastener styles: self-drilling anchors, plastic plugs, molly bolts, and toggle bolts. Making sure screws fit the provided anchors prevents installation issues.
Good sets boast organized compartments, installation aids, and straightforward instructions. Well-organized boxes, such as ones by Installation Parts Supply.com and KURUI, keep parts at hand during work.
| Anchor Type | Best for | Standard Weight Limit | Included with a quality kit |
|---|---|---|---|
| Threaded Anchor | Light to medium loads, small shelves | 10 to 50 lbs | Assorted sizes, matching screws, driver bit |
| Plastic ribbed anchor | Lights, frames, decor | 5 to 25 lbs | Varied diameters, short screws, labels |
| Molly bolt | Mid-weight items, bars | 50 to 150 lbs | Various lengths, tool, screws |
| Toggle anchor (including Snaptoggle) | Heavy items like TVs and cabinets | 100–300+ lb | Toggles, long bolts, installation guide |
| Masonry anchor | Concrete, brick, stone | Depends on size and wall | Concrete screws or sleeve anchors, drill bit spec |
Essential Tools And Supplies For Installation
Begin with the essentials: drill/driver and various sized drill and driver bits. You need these for creating pilot holes and setting fasteners. Add a manual driver or compatible bits to securely fasten screws without damaging them.
Use a stud finder for weighty objects, and a measuring tape and a spirit level for accurate marking and leveling. Essential: put on safety goggles to protect your vision while drilling.
Have pliers and a mallet ready for removing anchors and for soft strikes. A screw magnet or holder will keep screws straight, making installations quicker.
Pick a screw anchor kit matched to the weight and surface. Make sure it contains various anchors like self-drilling, molly bolts, and plastic ribbed ones for all needs.
Arrange your hardware in a clear box. Label your bits with painters tape for depth control and to protect the wall while drilling.
For securing furniture, employ safety straps or metal L-brackets. Drive screws into studs for firm stud anchoring. Large furniture must not depend only on drywall plugs for stability.
A useful tip: for pilot holes, select a bit thinner than your anchor and mark depth with a piece of tape. Keep a marked kit of commonly used fasteners for rapid maintenance.
Having an organized screw anchor kit and the right gear cuts down install time and minimizes wall damage.
Step-By-Step Guide To Using Wall Anchors
Use these instructions to guarantee strong installations using either a wall anchor set or a standard fastener pack. The instructions cover steps for self-drilling anchors, toggle systems, mollies, and plastic ribbed anchors. Choosing the correct anchoring method minimizes the risk of rework and harm to walls.
How To Install Self-Drilling Anchors
Initially, indicate the spot and align the anchor with the wall. These anchors generally don’t require pilot holes.
Grab a driver, or use a drill at a low speed setting, to screw in the anchor until it’s flush with the wall. Next, drive the screw and fasten it just until it’s secure. Be careful to halt before the anchor begins to rotate freely or damages the drywall.
How To Mount Toggle Anchors
Begin by boring a opening following the maker’s instructions. Next, slide the channel into the wall, and tighten the plastic to make sure it sits flush inside the wall.
Adhering to the guide, break off or cut the plastic legs. Next, screw the screw into the metal bar. Toggle anchors spread the load better, perfect for hanging hefty items. Ensure the cavity depth is deep enough to fully accommodate the toggle.
Installation Guide For Molly Bolts
Drill a hole that matches exactly the anchor diameter. Push the anchor in, then turn the screw to flair the sleeve, or use a specialized setting tool from your kit if available.
This process causes the sleeve to lock behind the drywall, holding it fast. Molly bolts are suited for mid-duty jobs like mounting shelving or medicine cabinets. Fortunately, the screw can be removed and reused if needed.
Using Ribbed Anchors For Light Objects
Make a hole a bit smaller than the anchor diameter or insert the plastic anchor and tap it lightly. After that, tighten the screw until it is firmly in place.
Plastic ribbed anchors expand a bit to support light loads like pictures or decorations, supporting about 20 to 25 pounds in regular sheetrock. They are great for temporary setups because of the minimal, easily repaired wall damage they cause.
Using Drywall Anchor Kit Examples For Specific Projects
When choosing anchors, think about the item and the wall type. An good fastener set provides a mix of hardware. This ensures you have the right solution for shelves, rods, frames, and safety straps.
To hang floating shelves
For installing shelves and curtain rods, opt for threaded anchors or molly bolts. These should have a rating of around 65–75 lb per anchor. Ensure you distribute the load across several anchors and follow the kit’s spacing instructions. Brands like E-Z Ancor and KURUI are recognized for providing dependable threaded anchors ideal for this.
Mounting TVs, cabinets, and heavy mirrors
Hanging heavy loads needs toggle bolts or stud mounting. Options like Snaptoggles and winged toggle bolts offer superior strength compared to regular plugs. Use studs whenever you can by screwing into them. If studs aren’t an option, choose a high-quality set with heavy-duty toggles for a safer installation.
Hanging light pictures and decorations
Lighter objects like picture frames and trinkets are best with plastic plugs. Look for ratings of 20–25 lb. These types minimize damage with smaller holes, are easy to take out, and are often included in sets from Everbilt. Use several anchors for grouped items to keep things even.
Securing furniture against tipping
To keep furniture upright, secure it with heavy-duty screws or dedicated straps. Don’t depend only on regular plastic plugs. Opt for anti-tip straps or L-brackets secured into studs. Alternatively, specialized kits provide the necessary stud-mount hardware. In rental properties, ask your landlord prior to installing and choose anchors that meets code.
Safety, Removal, And Maintenance Tips For Dry Wall Screws And Anchors
Begin with a careful check of each installation. Give a firm pull on mounted items to notice any give. For items bearing heavy weight, add weight gradually according to instructions, checking along the way. Additionally, consider door slamming vibrations or regular handling. Such dynamics necessitate a sturdy drywall screw with an correct anchor.
To ensure a secure hold, increase the load slowly, not all at once. An item might seem secure at first but give way with continuous use. Switch to a more robust screw and anchor combo if it moves during these tests.
Extracting anchors while preserving your wall’s integrity requires knowing your anchor type. If dealing with common plastic or self-drilling types, insert a screw partway, then use pliers to extract it. This technique causes minimal wall damage.
Plaster walls require a soft touch. Apply a wooden block on the surface to evenly distribute force and minimize plaster breakage. With threaded molly bolts, unscrewing partially straightens the sleeve, aiding a neater removal.
With toggle systems, adhere to the maker’s instructions for removal. You might need an inner part unlocked or the toggle trimmed for removal. If it’s stuck, snap the bolt, push the rest in, and cover the hole.
To mend tiny holes, use spackle and smooth for a smooth finish. Fix bigger holes with a mesh patch and joint compound, ensuring the area’s integrity is restored before reattachment of screws and anchors.
Decide to reuse anchors depending on condition. Anchors from reliable brands like Toggler or sturdy metal molly bolts are reusable if undamaged. Throw away and swap ones that are split, cracked, or have weakened.
With heavy furniture or fixtures, the consequences are serious. Don’t bother using old plastic plugs. Switch to hardware designed for wall studs or a high-capacity screw and anchor set. Picking correct parts minimizes failure risks and ensures safety.
| Task | Quick Tip | Replacement Time |
|---|---|---|
| Test hold | Test weight slowly, pull gently | If movement or noise occurs |
| Remove plastic anchors | Use screw and pliers to pull | If anchor deforms or stays lodged |
| Remove molly/toggle | Back screw to collapse sleeve or follow product steps | If metal shows bending or stripped threads |
| Plaster repairs | Use wood block to spread force when pulling | If plaster cracks or crumbles |
| Reuse decision | Inspect; use new for heavy items | For furniture or heavy mounts, always use new mounting screws and anchors |
| Buying Kit | Pick a screw and anchor kit with varied sizes and clear ratings | If kit lacks ratings or sizes |
Final Thoughts
A good drywall anchor kit can turn a wobbly job into a secure one and dependable. For light decorations, plastic plugs work fine. Medium-sized shelves are best suited for toggles or mollies. Heavy objects like TVs or cabinets usually require stud installation or robust anchors. A well-marked set makes easy finding the right match by showing weight limits and screw sizes.
Begin by examining the wall’s material and thickness. Then, select an anchor and screw set that provides explicit load ratings. The correct tools—a drill/driver, a stud sensor, and a spirit level—are crucial. Strict adherence to the guide ensures safe placement.
To prevent furniture from tipping over, attach it to studs using furniture straps or metal angles. Standard anchors aren’t strong enough for furniture. Opt for well-organized kits and high-quality hardware to trust every installation. Once installed, check their holding capacity and replace if they’re not secure or show signs of wear.
Choosing the right drywall anchor kit and equipment is vital for safeguarding your walls and belongings. Always opt for top-notch hardware, adhere to the instructions provided, and carry out strength tests on installations. Doing this contributes to a safer home and lasting results.